
Part 1. Enable NAT-T for IPsec on Windows XP
This is as per: http://support.microsoft.com/kb/885407
By default, computers that run Windows XP with Service Pack 2 and above that initiate IPsec-secured communications (hereafter referred to as initiators) no longer support using IPsec NAT-T to remote computers that respond to requests for IPsec-secured communication (hereafter referred to as responders) that are located behind a network address translator.
This is to avoid potential security issues as discussed in the following Microsoft Knowledge Base article 885348:
For example, if your virtual private network (VPN) server that is running Microsoft Windows Server 2003 is behind a network address translator, by default, a Windows XP SP2-based VPN client cannot make a Layer Two Tunneling Protocol with IPsec (L2TP/IPsec) connection to the VPN server.
Since my Openswan VPN server is behind NAT-T, I had to create and set the AssumeUDPEncapsulationContextOnSendRule registry value on the initiator which then allowed the XP netbook (IPsec NAT-T initiator) to connect to the Openswan VPN server (a responder that is located behind a NAT).
To create and configure the AssumeUDPEncapsulationContextOnSendRule registry value, follow these steps:
1. Click Start
2. Click Run
3. Type regedit, and then click OK.
4. Locate and then click the following registry subkey:
HKEY_LOCAL_MACHINE\SYSTEM\CurrentControlSet\Services\IPsec
5. On the Edit menu, point to New, and then click DWORD Value.
6. In the New Value #1 box, type AssumeUDPEncapsulationContextOnSendRule, and then press ENTER. Important This value name is case sensitive.
7. Right-click AssumeUDPEncapsulationContextOnSendRule, and then click Modify.
8. In the Value data box, type one of the following values, I opted for a value of 2:
0 (default)
A value of 0 (zero) configures Windows XP SP2 so that it cannot initiate IPsec-secured communications with responders that are located behind network address translators.
1
A value of 1 configures Windows XP SP2 so that it can initiate IPsec-secured communications with responders that are located behind network address translators.
2
A value of 2 configures Windows XP SP2 so that it can initiate IPsec-secured communications when both the initiators and the responders are behind network address translators. Note This is the behavior of IPsec NAT-T in Windows XP without service packs installed and in Windows XP SP1.
9. Click OK, and then quit Registry Editor.
10. Restart the computer.
After you configure AssumeUDPEncapsulationContextOnSendRule with a value of 1 or a value of 2, Windows XP SP2 can connect to a responder that is located behind a network address translator.
Part 2. Set up the Windows VPN Client
Note I am using an XP machine with Service Pack 3 (SP3), similar settings apply for Vista and Windows 7.
1. Click Start
2. Click Settings
3. Click Network Connections
4. Click Create a new connection
5. Select "Connect to the network at my workplace", Next...


Note: Certificates offer better strength security than PSK encryption however, for what I use the connection for PSK suffices for the time being and appears to be the more interoperable solution of the two.

14. On the Networking tab, set Type of VPN to "L2TP IPSec VPN"

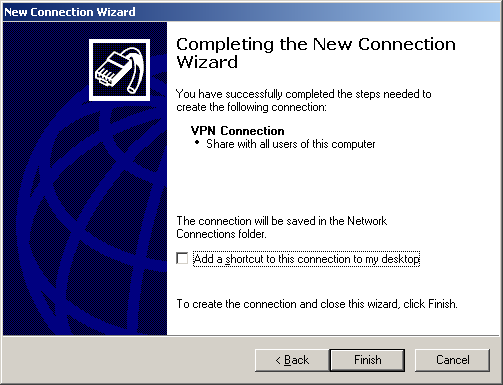
15. Finally click OK, and proceed to log in to your Openswan VPN server (see screen below)
User name and password are those specified in the chap-secrets file from the Openswan configuration on the server. The chap-secrets file is typically located at /etc/ppp/chap-secrets at least under Debian.
If the connection fails to connect try disabling firewalls on both machines if that's an option to help troubleshoot.
If the connection establishes and you then lose internet connectivity on the client check the NAT traversal and masquerading rules on the servers ip routing tables.
Both of the above are discussed here, which also discusses how I configured my Openswan VPN server.
Thank you very much! The registry value solved my problem for the Windows XP netbook.
ReplyDeleteThank you!it works fine.
ReplyDeletetop10-bestvpn.com
Thanks.It's good manual and great configuration for ipsec VPN client.
ReplyDeleteConnection works good.
10webhostingservice
That’s nice. I am also in need of the VPN service so was seeking such informative tech reviews. So found this post really useful. Will surely try this windows L2TP IPsec VPN connection to Openswan Sever on Ubuntu. Thanks for sharing the details.
ReplyDeleteFastestVPN offering OpenVPN (TCP, UDP), L2TP, PPTP, IKeV2, OCServ, OpenConnect with high-rated encryption.
ReplyDeleteCyber Monday Special Deal - Get Ivacy VPN on this cyber monday for Just $1.34/Month
ReplyDeleteBest VPN Deal
Use promo code icm10 for discount price
Great! It sounds good. Thanks for sharing.. expressvpn free trial
ReplyDeleteThis is a great inspiring article.I am pretty much pleased with your good work.You put really very helpful information. Keep it up. Keep blogging. Looking to reading your next post. top android vpn
ReplyDeletegoogle 3356
ReplyDeletegoogle 3357
google 3358
google 3359
google 3360
google 3361
nice post
ReplyDeleteThis article is very well written and given the full information about VPN. How can it benefits us while working on the internet. I have been searching for basic services of internet then I got to know about your site. so keep sharing good content with us.
ReplyDelete